These tips are for crafters who already know the basics and want smoother, faster and tidier diamond paintings. You will find simple habits and low-cost tools that help with flat canvases, organized drills, quicker placing and a neat finish. Pick the ones that suit how you work, and your next kit will go together with less effort and better results.
Every kit ships free worldwide with a velvet canvas, AB drills and all the tools.
Shop diamond painting kitsQuick wins before you start
Spend ten minutes on setup and you will save hours later. These small steps make a big difference on any size of kit.
- Check the kit. Open the box and confirm you have the canvas, drill bags, trays, tweezers, pens, multi-placer, wax and instructions.
- Read the legend. Learn which symbols sit side by side, so you know where mix-ups are likely.
- Pick a starting corner. Choose one edge and work across it in rows, rather than hopping around the canvas.
- Dip the pen in wax. A touch of wax on the pen tip helps it pick up drills cleanly.
Start with a flat canvas
A flat canvas makes every row easier to place. If yours arrives rolled, lay it under a few heavy books for several hours before you begin. For creases, iron the back on the lowest setting with a thin cotton cloth between the iron and canvas, and press for a few seconds at a time. Our full guide on removing wrinkles and creases has more methods.

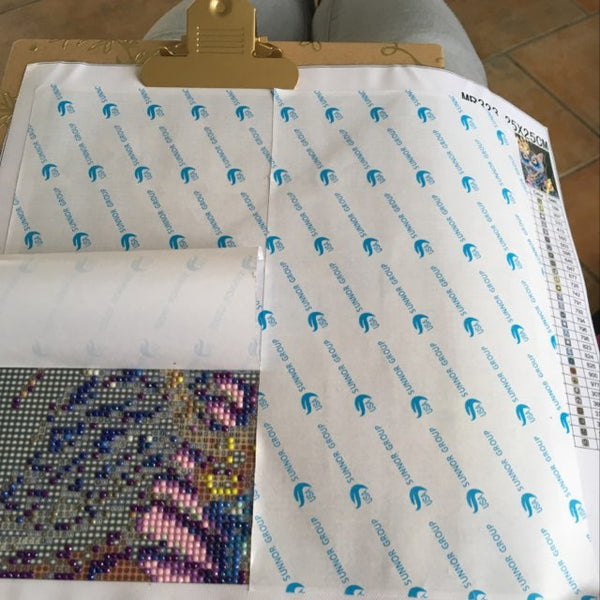
A clipboard or a firm board also keeps the canvas steady. Clip the top edge, and the canvas will not slide while you work. A big clipboard gives you a flat, portable surface for the couch or a trip.
Organize your drills
Your kit comes with pre-sorted drills and two trays. Keeping colors apart is the single best habit for avoiding wrong placements.
- Use labeled containers. Put each color in a small jar or a storage box with labeled slots.
- Write the symbol on the lid. You can find the right color at a glance.
- Egg cartons work at home. They are handy for a quick sort, but they are not sealed, so use proper containers if you move or travel.


Another trick for beginners is to stick one drill next to its symbol on the legend, so you can match color and symbol quickly.

Place drills faster
A multi-placer picks up several drills at once, and it is the quickest way to fill large blocks of one color. Your kit includes a 3-piece multi-placer. Replacement heads give you more sizes for different areas.


Use a single-drill pen for fine detail and edges, and the multi-placer for open areas. A roller or rolling pin also helps. A gentle pass presses all the drills flat and sets any that are standing proud.

| Task | Best tool | Why |
|---|---|---|
| Large blocks of one color | Multi-placer | Places several drills per pass |
| Fine detail and edges | Single-drill pen | Precise control |
| Popping or lifted drills | Roller | Presses them flat and even |
| Dust on the canvas | Soft brush | Keeps the glue clean |
Set up your workspace
- Light it well. A light pad or lamp makes symbols easier to read and reduces eye strain.
- Clear the table. Keep only your canvas, trays and tools in reach.
- Sit comfortably. Our guide on avoiding hand, neck and back pain helps you set up well.
- Start from the bottom. Working upward keeps your arm from brushing placed drills.


Take a short break every hour to rest your eyes and stretch your hands. Many crafters set a timer, which also makes it easier to track how much you finish in each sitting and to see your progress grow.
Keep a soft brush nearby and dust the canvas now and then. Clear symbols and a clean surface help each drill stick properly.

Finish with care
Once the last drill is down, roll the surface, wipe away any wax and check for gaps. Sealing protects the piece and framing gives it a finished look. Read how to seal and frame your diamond painting, and consider a wooden frame for display.


Pace yourself. A 30 x 40 cm kit holds about 19,200 drills and takes roughly 10 to 15 hours, so short daily sessions beat long marathons. Set a small goal, such as one color block or one row of the legend, and stop when you reach it. Your wrists and eyes will thank you, and the finished piece will look more even because you stayed fresh.
Choose drill shape to suit you. Square drills give a crisp mosaic look and are good for fine detail, while round drills are quicker to place and add extra sparkle. If you are not sure, a round-drill design is a gentle way to start, and you can try square on your next kit.
Use your leftover drills
Every kit includes spares, so you will have a few left over. Do not throw them away. Store them in a labeled bag, since they come in handy for fixing a gap on your next project. You can also use them for small crafts such as decorating a card or a phone case. See things you can do with extra diamonds for ideas.


Put these tips to work on a new design. Buy 2 kits and save 10%, or buy 3 and save 15%, applied at checkout.
Shop best sellersFrequently asked questions
What is the fastest way to place diamond painting drills?
Use a multi-placer for large blocks of one color and a single-drill pen for details. Work one color at a time.
Should I start at the top or bottom of the canvas?
Many crafters start at the bottom and work upward, so their hand does not brush drills already placed.
How do I flatten a rolled canvas?
Put it under a few heavy books for several hours, or iron the back on low heat with a thin cloth.
Can I use egg cartons to store drills?
They work for sorting at home, but they are not sealed. Use proper containers for travel or long-term storage.
What can I do with leftover drills?
Keep them as spares for fixes, or use them in small crafts such as cards and phone cases.
Small habits add up. A flat canvas, sorted drills and the right tool for each job turn a long project into a relaxing one.
Choose your next design and enjoy free worldwide shipping with tracking.
Shop all kits