We all know that starting a new project can be a little daunting, especially if it's a diamond painting project. When you start a diamond painting, you might be intimidated by the prospect of creating something so beautiful. But when you make mistakes or encounter problems, it can quickly turn into high levels of frustration.
When it comes to "diamond painting" there are plenty of things that can go wrong. Like, getting wrinkles on your canvas, spilling your diamonds, and much more. If you're new to diamond painting, it's easy to make mistakes that can cost you time and money.
But luckily, we're here to help! Below are some tips to help you avoid common mistakes and troubleshoot the common problems you may encounter.
Peeling off all of the cover from the canvas
Removing the entire cover paper from the canvas of a diamond painting at once can be tempting, but it's a big no-no, it can decrease the quality of your diamond painting canvas. So, resist the urge! Take it slow, and remove one section at a time. If you remove the entire cover from the canvas of your diamond painting, the canvas adhesive will start to dry out and become less sticky.
In addition, the cover paper acts as an essential barrier between your diamond painting and any external contaminants such as dirt, dust, or oil from your skin. So it's important to only remove the areas of the cover that you are currently working on and keep the rest of the canvas-covered until you are ready to use it.
Remove one section of cover at a time and work your way around the canvas.

How to Fix the entire canvas cover removed?
It is best to avoid removing the cover paper altogether if possible, as it can be difficult to replace and does serve an important purpose in protecting the quality of your diamond painting. When you're ready to start, gently peel back a corner of the cover and begin applying your diamonds to the canvas. Once you have completed an area, you can carefully remove the other area of the cover. Work slowly and methodically, making sure that each diamond is securely in place. If any come loose, simply press them back into the adhesive.
If you have removed the cover from your canvas, you can try to reattach the cover with adhesive tape or other materials. If even a piece of the cover paper is removed from the area where you are not working, it is important to tape that area off so that no further adhesive is exposed.

Spilling your diamonds
If you've ever done a diamond painting, you know that there's always a risk of spilling the diamonds. And when that happens, it can be a real pain to try to pick them up. This pain of spilled diamonds is something that can be quite difficult to deal with.
If you have ever worked with glitter or other small objects, you know that it can be very easy to accidentally knock them over and cause a mess. The same is true for diamonds from your diamond painting. Your diamonds can get spilled in many ways. You may accidentally drop them while working on your project, or they could fall out of the tray while you're carrying it. If you have young children or pets, they may also be able to knock over the tray and spill the diamonds.
When you are working on a project and you spill the diamonds, it can be very annoying and troublesome.

If you have spilled your diamonds, don't worry! There are some things that you can do to pick up your diamonds. Your diamonds can be collected and put back into the tray.
- First, try using a vacuum cleaner with the hose attachment to suck up the spilled diamonds. Be sure to go over the area several times to get all of the diamonds.
- If you don't have a vacuum cleaner, you can use a whisk broom, and dustpan to sweep up the diamonds and pick them up. Be careful not to lose any of the diamonds while you're sweeping them up.
- If that doesn't work, you can try using a lint roller to pick them up. Just be careful not to roll over any areas that you don't want to get adhesive.
- If all else fails, you can always try using a bit of tape to pick up the diamonds. Just lay the tape down on the ground and pick up the diamonds with the sticky side and get the diamonds back. Be careful not to stick the tape to the diamond painting itself.
With these tips & tricks, you should be able to pick up any spilled diamonds from your diamond painting kit. Just be patient and careful, and you'll have those diamonds back in no time.
Liquid Spill on your Canvas
Liquid spilling on the canvas of your diamond painting kit is one of the worst things that can happen. A liquid spill on the canvas can ruin the diamond painting project.
There are many potential causes for the liquid to spill on the canvas of your diamond painting. From accidentally knocking over a cup or glass while working on your project to using a liquid spilled surface for your diamond painting. Or you forget to close a nearby pen or marker glue and some of its ink has seeped out onto the surface of your canvas. Whatever the cause, it is important to clean the spill as soon as possible to prevent damage to your diamond painting.

How to Fix Liquid Spill from your Canvas?
If you have spilled something on your project, first of all, don't panic! It's not the end of the world, and it can be fixed. Immediately blot out the area with a clean, dry cloth to absorb as much of the liquid as possible. Or you can turn the canvas upside-down to throw the liquid away. Be careful not to rub the spill, as this can spread it further. Once you've blotted out the spill, gently brush away any dried residue with a soft, dry brush.
If the stain persists, you can try dabbing it with a damp cloth, but be sure to use small amounts of only distilled water or an alcohol-free cleanser. Never use anything harsher, as it could damage the canvas. If the spill is small, you can use a hairdryer on a low setting, to make your canvas dry by heat.
With a little care and attention, liquid spills don't have to mean the end of your diamond painting project!

Not Cleaning Diamond Painting Before Sealing
One of the most important things you can do to ensure that your diamond painting lasts for years to come is to make sure that you seal it. But If you don't clean your diamond painting down before you seal it, the dirt and debris on the surface will also be sealed in your painting which will result in a dull and lackluster finish.
Cleaning your diamond painting may seem like a small thing, but if there is any dust or dirt on your painting when you seal it, it will be sealed in and will be much more difficult to clean later on. Sealing your diamond painting is important to protect it, but you need to make sure that you do it correctly in order to avoid any problems down the road. Wiping your painting down with a clean cloth before you seal it is the best way to ensure that it will stay looking its best.

How to Fix Sealed Dust & Dirt?
In case, you have sealed your diamond painting along with the dust and dirt. You can try some things to solve this problem. The first step is to gather all the materials you need. This includes a clean, lint-free cloth and some distilled water. You will also need a toothbrush with soft bristles.
- Next, lay your painting down on a flat surface. Make sure that the area you are working in is well-lit so that you can see the dirt and dust particles.
- Take the clean, lint-free cloth and dampen it with some distilled water. Gently wipe down the surface of your painting, being careful not to disturb any of the glue or beads.
- If there are any stubborn dirt or dust particles, take the toothbrush and gently scrub the area. Once you have removed all of the dirt and dust, allow the painting to dry completely before handling it.
If the above solution did not work, you can clean dust and dirt that is sealed with sealing in your diamond painting, with a sealant remover. You can find this at most hardware stores. Apply the remover according to the instructions on the package. Once the sealant has been removed, you can then proceed to clean the area with a damp cloth.

Wrinkles in Canvas
Canvas is a popular medium for artwork, but many people are annoyed by the appearance of wrinkles in their paintings. Wrinkles in canvas are frustrating. They can ruin an otherwise perfect painting. The canvas can become wrinkled if it is not stored properly. To avoid this, always make sure to store your canvas in a cool, dry place. If you must store it for an extended period of time, consider rolling it up rather than folding it. Wrinkles can also occur in your canvas if you're not careful while folding them. Make sure to fold it evenly and gently to avoid any creases or wrinkles.
Sometimes, your diamond painting’s canvas may also get wrinkles during shipping due to improper storage. If this happens, don't lose heart you can easily fix this mistake.

How to Fix Wrinkles in Your Canvas?
Canvas wrinkles can be caused by a variety of factors, such as improper storage, folding, or humidity. But don't despair there are ways to remove them!
- Ironing
One method is to simply iron the canvas. You can remove wrinkles from your diamond painting’s canvas by ironing the canvas on the reverse side. Use a spray bottle to mist your canvas lightly with water. Place the canvas on an ironing board, and then cover it with a thin cotton cloth. Turn your iron on, set your iron to low heat, and then run it over the cloth-covered canvas for about 30 seconds. Allow the canvas to cool for a minute or two, and then check to see if the wrinkles have been removed. If they have not, repeat the process. Once the wrinkles are gone, hang your canvas up to dry completely.
- Steaming
If you want to remove wrinkles from your canvas, one of the best ways to do so is by using a steamer. This will help to quickly and easily remove any wrinkles that may be present on the surface of your diamond painting’s canvas. Simply hold the steamer up to the wrinkled area and allow the steam to penetrate the fabric and loosen up the wrinkles. Once the wrinkles are loosened, you can then use your hands to smooth them out. Use a pressing cloth between the steamer and the canvas to protect it from direct contact. Don't steam for too long or too close to the canvas,
- Blow drying
Another option is to use a hairdryer on a low setting. Hold the hair dryer about 6 inches from the canvas and move it back and forth over the wrinkled area until the wrinkles start to loosen. You may need to do this a few times to get the wrinkles out completely.
So there you have it - a few different methods for removing wrinkles from the canvas. Give them a try and see which one works best for you!
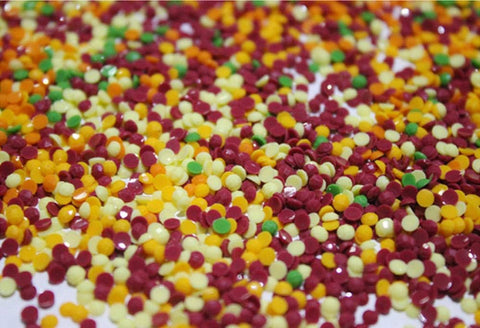
Mixing up your diamonds
What a pain it is to accidentally mix up the different colored diamonds with each other. It creates such a mess and it can be really tough to try and sort them all out again. Plus, it just makes the whole process of working on your "diamond painting project" frustrating and much more difficult.
When you're working on a diamond painting, it can be easy to accidentally mix up the diamonds and beads. This can create a big problem and cause trouble for your project. Diamonds come in separate bags for a reason, so that they don't mix up and are easy to be organized.
Mixing up your diamonds is real anxiety!
To avoid this distressful disaster situation of mixed-up diamonds, use the following tips.
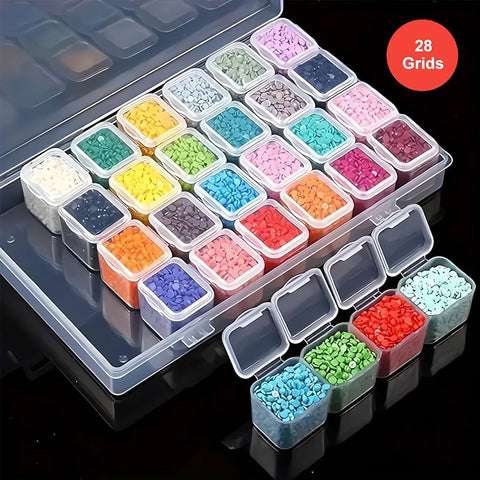
- Use different containers: Invest in some small containers or vials to store each type of diamond in different containers. This will make it easier to grab the right one when you need it.
- Label the containers: Use labels for your diamonds so you know which one is of which color. This will help you quickly grab the right container when you're ready to work. You can use tape or stickers for this.
- Take a break: Consider taking a break for some time from your project if you start to get confused about which gem goes where. This will help you clear your head and start fresh.
By following these tips, you can avoid mixing up the diamonds and beads in your project. This will help you stay organized and on track, so you can finish your project quickly and easily.
How to Fix Mixed-Up Diamonds
Mixing your diamonds together can waste a lot of your time and energy. If you find yourself in this predicament, here are a few tips to help you get everything sorted out again.
- First, take a deep breath and try to calm down. It's easy to get frustrated when things like this happen, but it's important to stay calm and think clearly. Otherwise, you'll just make the situation worse.
- Next, take a look at all of the diamonds that are mixed together and try to separate them out as best as you can. You can use a tweezer or your fingers to do this. You can also use a sharp object like a toothpick to sort the diamonds by color. This can be done by dumping all of the diamonds out onto a flat surface and then using a toothpick, to help in picking out the diamonds and sorting them.
Once the diamonds are separated and stored in their bags or container, you can then continue with your project.
There are many problems that can occur while you're making a diamond painting but don't worry, they can be fixed! Hopefully, now you will avoid these problems when you are working on your piece of art. And you know now how to fix the most common mistakes that may occur. If you're having trouble getting the hang of it or just need a break, take a step back and admire your progress from afar. It can be easy to get caught up in the small details and forget how much you've accomplished When you're finished, your diamond painting will be a beautiful and unique work of art that you can proudly display in your home.