Common Diamond Painting Mistakes and How to Fix Them
Navigating through the world of diamond painting can sometimes feel like solving a puzzle. When things don't quite snap into place as expected, it can turn an enjoyable session into a tricky challenge. Understanding common pitfalls and how to correct them ensures that your artwork remains a source of pride and joy. Let’s delve into some frequent issues related to diamond painting and explore effective solutions to keep your canvas looking pristine.
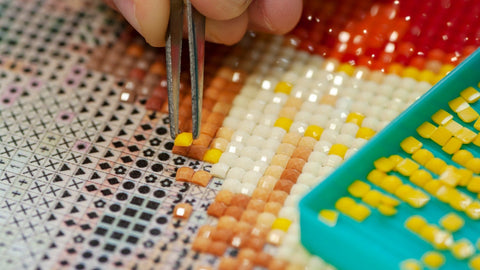
Uneven Diamond Placement
Diamonds not sticking straight
Possible Causes: Uneven pressure during application or a faulty technique can lead to misplaced diamond drills, rather than sticking straight.
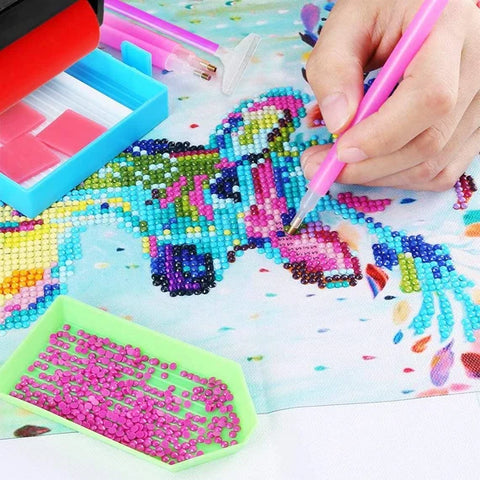
Solutions: To achieve that satisfyingly straight alignment:
- Consistent Application Pressure: Practice applying diamonds with even, gentle pressure. Consider using a diamond painting pen fitted with a comfort grip to enhance control.
- Straight Edge Guide: Use a ruler tool or a specifically designed straight edge tool as a guide when placing diamonds. This can act as a training aid until you develop a more steady hand.
Diamonds not fitting properly in the grid
Possible Causes: This can be frustrating and is often due to receiving the wrong drill size or a misprinted canvas.
Solutions: Here’s how you can address this:
- Check Drill Size: Before you start, ensure all drills are uniform and match the size specified for your canvas. A simple caliper can be a handy tool in verifying sizes.
- Embrace Imperfections: If the canvas is misprinted, which sometimes happens, consider creatively incorporating these imperfections into your artwork. If slight misalignments are unavoidable, focus on how the overall image is shaping up rather than perfection in every cell.
Diamond Painting Canvas Issues
When diving into a diamond painting project, the canvas itself can sometimes present challenges that need clever solutions. Dealing with issues like a curling canvas or diamonds that refuse to stick can be frustrating, but with the right techniques, you can easily get back to creating a masterpiece. Let's explore some effective strategies to overcome these hurdles.
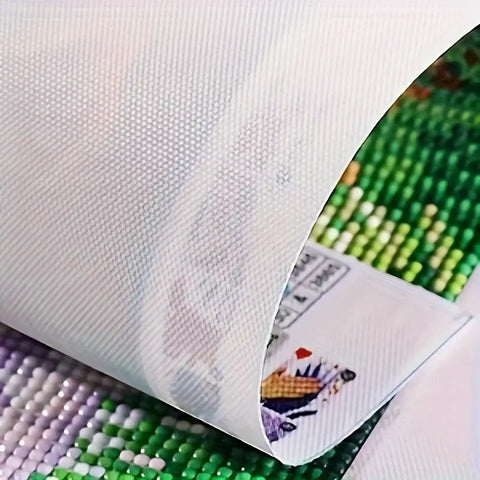
Curling Diamond Painting Canvas
Possible Causes: Often, a curling canvas can be the result of using low-quality materials which may not lay flat naturally.
Solutions: To ensure your canvas is perfectly flat and ready for diamond application, try these methods:
- Heavy Books Technique: One of the simplest ways to flatten a curling canvas is to place it under a stack of heavy books. Lay your canvas on a flat surface, cover it with a clean sheet to protect the surface, and then stack books evenly across the area for at least 24 hours.
- Weighted Flatting: For larger canvases, using weights across the corners and edges might be more effective. Make sure the weights distribute evenly to avoid creating new creases.
Diamond Drills Not Sticking to Canvas
Possible Causes: This issue might be due to the adhesive drying out or the canvas becoming dusty, which prevents the diamonds from adhering correctly. Solutions: Keeping your canvas ready for the diamonds involves a couple of straightforward fixes:
- Reapplying Adhesive in Sections: If the glue on the canvas has dried, applying a thin layer of fabric glue or repositionable adhesive can revive the stickiness. Work in small sections to maintain control over the adhesive's application.
- Cleaning the Canvas: Before reapplying adhesive, ensure the canvas surface is clean. Gently wipe the area with a slightly damp cloth to remove dust or debris, then allow it to dry completely before continuing with your project.
Diamond Painting Color Mishaps
Color accuracy is crucial in diamond painting to ensure the final artwork reflects the intended design. However, color-related issues like using the wrong diamonds or discovering missing drills can disrupt the process. Let’s tackle these common mishaps with effective strategies that ensure your painting shines with the right hues.
Accidental Use of Wrong Color Diamond Drills
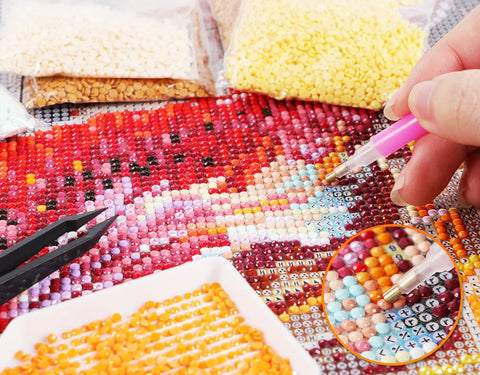
Possible Causes: Rushing through your project or working under poor lighting can lead to accidentally picking up and placing the wrong color diamonds. Solutions: To minimize these errors and correct any that occur:
- Slow Down: Take your time, especially when working with similar colors. Rushing increases the likelihood of mistakes.
- Enhanced Lighting: Ensure your workspace is well-lit. Daylight LED lamps can provide bright, natural light that helps distinguish between colors more effectively.
- Using a Color Chart: Keep a color chart handy and refer to it frequently. This can help you double-check that you’re using the correct diamonds before placing them.
- Techniques for Identifying Misplaced Diamonds: Periodically step back from your work to view the overall picture. Sometimes, errors are easier to spot from a distance. Also, taking photos of your progress and viewing them on a screen can help highlight any color discrepancies.
Missing Diamond Drills
Possible Causes: It’s not uncommon to lose some drills due to spilling, or you might find your kit was incomplete from the start.
Solutions: Here are ways to manage and mitigate the impact of missing diamonds:
- Sorting Techniques: If you’ve spilled your diamonds, using a small vacuum with a stocking over the nozzle can help recover them without loss. Regularly sorting your diamonds as you work can also prevent them from going astray.
- Contacting the Supplier: If your kit arrives with missing colors, don’t hesitate to contact the supplier. Most reputable companies like All Diamond Painting are willing to send replacements for incomplete or defective kits.
Diamond Painting Finishing Touches
As you near the completion of your diamond painting, ensuring that the final presentation is pristine is crucial. Even after careful placement of each diamond, dust and debris can accumulate on your masterpiece, potentially marring its appearance. Here’s how to tackle this final hurdle and ensure your artwork remains spotless.
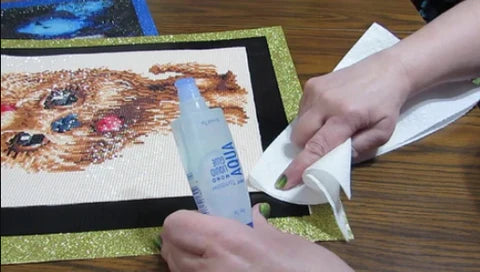
Dust and Debris on the Finished Painting
Possible Causes: During the lengthy process of completing a diamond painting, it's common for dust to settle on the sticky surface, especially if the project spans several days or weeks.
Solutions: To ensure your finished painting sparkles without any blemishes:
- Using a Lint Roller: A lint roller is an effective tool for picking up loose particles without damaging the surface. Gently roll it over the canvas to capture any dust and lint.
- Damp Cloth Method: For more stubborn debris, lightly dampen a microfiber cloth and carefully wipe the surface. Ensure the cloth is just barely damp to avoid dissolving the adhesive or damaging the integrity of the diamonds.
- Regular Cleaning During the Process: To prevent a significant build-up of dust, it’s a good idea to lightly clean the painting regularly throughout the crafting process. This preventative measure can save time during the final cleaning phase.
Tips to Prevent Diamond Painting Mistakes
While diamond painting is a relaxing and rewarding hobby, a few simple strategies can help you minimize mistakes and enhance your overall experience. By adopting these best practices, you can ensure smoother progress and a more enjoyable crafting session.
- Work in Small Sections: Tackling your canvas in small, manageable sections can significantly improve accuracy. This approach allows you to concentrate on getting every detail right without feeling overwhelmed by the scale of the project.
- Use Good Lighting: Proper lighting is crucial for identifying the correct colors and placing diamonds precisely. An adjustable desk lamp or a craft light with a magnifying glass can make a world of difference, especially when working with similar shades.
- Take Breaks to Avoid Fatigue: Regular breaks help maintain your energy levels and reduce the risk of mistakes due to tiredness. Step away from your work every hour or so to rest your eyes and stretch, keeping your mind sharp and your movements accurate.
- Double-Check Colors Before Placing Diamonds: Before sticking each diamond, double-check it against the color code and symbol on the canvas. This precaution is particularly important in sections with a variety of similar hues, helping prevent disruptive color errors.
- Invest in Good Quality Tools and Materials: High-quality tools not only last longer but also provide better performance. Investing in a good diamond applicator, comfortable tweezers, and reliable adhesive can make your diamond painting process more efficient and enjoyable.
Perfecting Your Diamond Painting Technique
Mastering diamond painting involves more than just placing diamond drills on a canvas; it requires careful attention, proper preparation, and the right tools. By working in small sections, utilizing good lighting, taking regular breaks, double-checking colors, and investing in high-quality materials, you can enhance your crafting experience and minimize common mistakes. Embrace these diamond painting tips to ensure each diamond painting project is a success, allowing you to enjoy the process and delight in the dazzling results of your efforts. Whether you’re a beginner or an advanced crafter, these strategies will help you perfect your technique and create stunning artworks to be proud of.