These diamond painting hacks are for anyone who wants to finish kits faster, keep the canvas clean and stop drills from misbehaving. You will find setup tips, ways to section the canvas, fixes for static, multi-placer technique, storage and labeling ideas, wax alternatives, the tools worth buying, and how to finish and seal the piece. Most hacks cost nothing and work with any kit.
Our kits include a multi-placer, 2 pens, tweezers, 2 trays and wax, so you can use these hacks from day one.
Shop diamond painting suppliesPrepare before you begin
A few minutes of setup saves time later.
- Flatten the canvas. If it arrives rolled, lay it flat under heavy books for a few hours, or roll it gently against the curl. Our guide to removing wrinkles and creases has more methods.
- Secure the edges. Binder clips or washi tape keep the canvas from shifting, especially on large sizes.
- Wipe the table. Dust and lint weaken the glue, so clean the surface with a microfiber cloth before you open the drills.
- Keep tools within reach. Pen, wax, tweezers and trays should live in one small tray so you never hunt for them mid-session.

Work in sections
Peeling off the whole film at once lets dust, pet hair and fingerprints settle on the glue. Instead:
- Draw a grid. Lightly mark squares on the film with a marker so each one becomes a mini project.
- Uncover only what you need. Peel back one section, finish it, then cover it again.
- Protect finished areas. Lay parchment paper or the release paper over completed sections to keep them clean.
- Follow a direction. Work top to bottom or left to right (reverse it if you are left-handed) so your hand does not rest on finished drills.
Beat static
Drills that cling to the tray or pen are usually a static problem. Try these fixes:
- Dryer sheet. Put a small piece inside the drill container.
- Cool, dry storage. Keep drills away from direct sun and heaters.
- A pinch of baby powder. Shake lightly in the tray to cut friction. This helps most with AB drills.
- Wipe your tools. Clean plastic trays and pens with a dryer sheet or cloth, and touch a metal object before you start.
For more detail, read our guide to preventing static cling drills.
Use the multi-placer
A multi-placer picks up several drills at once, which saves a lot of time on large blocks of one color. Your kit includes a 3-piece multi-placer.
- Start small. The 3-piece tip gives the most control while you learn.
- Line up the drills. Shake the tray gently so the drills sit in neat rows before you pick them up.
- Keep the tip tacky. Wipe off dust and refresh the wax when the grip fades.
- Slide along a guide row. Press lightly next to the last row so lines stay straight.
Straight edges matter most on square drills. An anti-stick ruler lays out a clean line for you to follow.


Label and sort your drills
Good storage saves more time than any gadget.
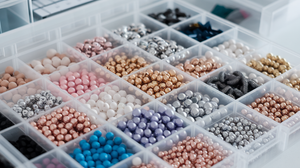
- Use clear containers. Stackable boxes or small jars keep each color visible. Label each one with its symbol or DMC number.
- Keep the chart nearby. Tape the color chart inside the lid for quick checks.
- Sort in order. Number or alphabetical order makes a 40-color design much easier to manage.
- Pre-pour the next colors. At the end of a session, fill the tray for next time so you can start straight away.


Wax alternatives
Every kit includes 2 pots of wax, and it can dry out over a long project. If yours loses grip, these options work for some crafters:
| Option | Why people use it | Note |
|---|---|---|
| Putty or reusable tack | Flexible grip, little residue | Good for detail work |
| Beeswax | Lasts several sessions | Warm slightly to soften |
| Silicone wax pad | Reusable, wipes clean | Tidy for long projects |
| Unscented candle wax | Cheap and easy to find | Warm it a little first |
| Lip balm | Quick emergency fix | Short term only, can leave residue |
Tools worth buying
You do not need every gadget, but a few upgrades make sessions smoother:
- Light pad. Lights the canvas from below so faint symbols are easier to read.
- Adjustable stand. Holds the canvas at a comfortable angle.
- Roller. Presses every drill into the glue after you finish a section.
- Extra trays with a spout. Lets you work on several colors and pour leftovers back.
- Scraper or tweezers. Fixes a crooked drill without lifting the glue. See the scraper tool.
- Storage and labeling kit. Keeps colors from getting mixed.
Browse the full range in our diamond painting supplies collection.
Stay comfortable and focused
- Work in short bursts. Try 20-minute sessions with a short break.
- Add music or a podcast. Steady background sound makes long sessions pass quickly.
- Keep snacks away. Crumbs and sticky fingers ruin the glue.
- Use soft lighting. Harsh overhead light makes symbols harder to read.
- Take movement breaks. Stand, stretch your hands and reset your posture now and then. Our guide to avoiding hand, neck and back pain has more ideas.
- Silence your phone. Distractions cost more time than any tool saves.
- Set a goal per session. Finishing one grid square is easier to feel good about than staring at the whole canvas.
Quick mini hacks
- Keep a lint roller nearby. It picks up pet hair and dust from the table and canvas edges. Roll gently so you do not lift drills.
- Use angled tweezers. They give better control when you fix a tilted drill.
- Store canvases flat. Keep unfinished kits in a portfolio or under a board, with parchment paper between stacked canvases.
- Add a non-slip mat. A washable silicone mat catches spills and stops drills bouncing away. A light color makes dropped drills easy to spot.
- Build a small ritual. A drink, soft music and a tidy corner make it easier to sit down for a short session, and short sessions add up to finished kits.
Flatten, roll and seal
Once the last drill is placed, finish the job properly.
- Roll the surface. A roller or flat tool presses down any loose drills. Use tweezers to correct raised ones.
- Seal lightly. A thin coat of clear sealer locks drills in place. Avoid thick layers that dull the shine. Glue and resin can help with stray drills.
- Let it dry fully. Keep it flat, out of direct sun, until nothing feels tacky.
- Frame with depth. Leave a gap so the glass does not press on the drills. See how to seal and frame.

Frequently asked questions
How can I make diamond painting faster?
Use the multi-placer on large blocks of one color, work in sections, keep drills sorted and pre-pour the next colors. A 30 x 40 cm kit is about 19,200 drills and typically takes 10 to 15 hours, so small time savings add up.
How do I stop drills sticking to my tray?
Static is the usual cause. Put a small piece of dryer sheet in the container, wipe the tray, and store drills somewhere cool and dry. A pinch of baby powder also helps.
What can I use if my wax dries out?
Reusable putty, beeswax, a silicone wax pad or unscented candle wax all work. Warm them slightly for a better grip.
Should I peel off the whole film at once?
No. Uncover only the section you are working on and re-cover it when you stop. That keeps the glue clean.
What tools are really worth buying?
A light pad, a good storage box and extra trays give the biggest gains. Everything else is optional.
Start your next project
The right kit and a tidy setup make every hack easier to use. Pick a design and get stocked up.
Buy 2 kits and save 10%, or buy 3 and save 15%, applied automatically at checkout.
Browse all kits