This guide covers the diamond painting tools worth owning and how to use each one. It is for beginners deciding what to buy beyond the kit, and for experienced crafters who want to work faster and with less strain. You will see what is already in the box, which extras make the biggest difference, and the simple techniques that turn a pile of drills into a finished picture.
Every kit includes tweezers, 2 pens, a 3-piece multi-placer, 2 trays and 2 pots of wax. Free worldwide shipping.
Shop diamond painting toolsWhat is already in your kit
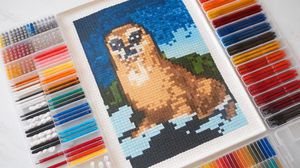
You can start with nothing extra. Each kit has a canvas with printed symbols, pre-sorted drills with spares, two trays, tweezers, two pens, a 3-piece multi-placer and two pots of wax. That covers the basics of picking up, placing and fixing drills.

Think of the kit tools as your starting set and the extras as upgrades for particular jobs. A 30 x 40 cm design holds about 19,200 drills, so even a small time saving per row adds up over 10 to 15 hours of work. Extras are about comfort and speed. If your project is large, you work for long sessions or you struggle to read symbols, a few well-chosen tools pay for themselves quickly.
Core tools and how to use them
Multi-placer pen
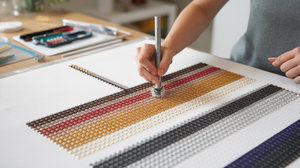
A multi-placer picks up several drills at once, so it is the fastest way to fill a block of one color. Press the tip into the wax, lift a row of drills and set them down together. Replacement heads let you choose the size that suits the area you are working on.

Wheel and roller tools
A wheel tool lets you pick up and set down drills in a line, which suits big blocks of color. After you finish an area, a roller presses everything flat and sets the drills firmly into the glue.

Tweezers
Tweezers are for corrections. Use them to lift a crooked drill, move a drill that has landed in the wrong cell, or pick up one that has stuck to your sleeve. Choose a pair with smooth tips and a firm grip.


For long sessions, the anti-stick ruler keeps your palm off the glue, and a scraper tool helps straighten rows.
Light and magnification
Good light is the biggest upgrade for most people. A light pad glows through the canvas and makes symbols pop, and it is thin enough to take anywhere. A magnifier lamp or a headband magnifier helps with small symbols and fine detail.


Hold the magnifier close to the surface, without touching it, so you see each drill clearly. If you have trouble reading symbols, try the light pad first, then add magnification.
Sorting and storage
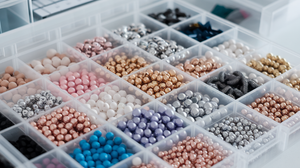
Drills must stay apart by color. You can use the bags that come with your kit, then move drills into containers as you work. Common choices are egg cartons, ice cube trays with lids and small screw-cap vials. A proper organizer with labeled slots does the same job and is easier to carry.


Label bags or lids with the symbol and color number from your canvas so you can pull the right color without checking the legend each time.

Our tools and drills storage box and storage bag keep everything together for the couch or a trip.
Which extras to buy first
If you are on a budget, buy in this order. First, a light pad or lamp, because it improves accuracy right away. Second, a storage box, which keeps colors separate and your table tidy. Third, a roller for finishing. Fourth, extra multi-placer heads and a headband magnifier if you work on very detailed designs. This order follows how much each tool changes your day-to-day experience, and you can add pieces slowly.
Look after your tools
Wipe pen tips and trays with a soft cloth, add fresh wax when the tip stops picking up drills, and keep tweezers dry. Store everything in one place so you never start a session hunting for a pen. A few seconds of care at the end of each sitting keeps your tools working like new, and it prevents dust from reaching the glue on your canvas.
Techniques that save time
The right method matters as much as the right tool.
- Plan first. Look at the whole canvas and pick a starting corner.
- Work in small sections. Peel back only the film you need and finish an area before moving on.
- Go color by color. Pick one color and place it across a whole section.
- Go row by row. Work along a row so you can see your progress and keep lines straight.


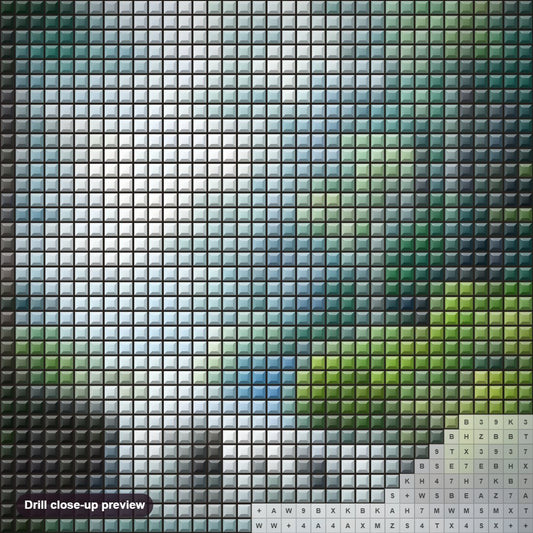
For areas with two close shades, try alternating between them in a checkerboard pattern, which makes the transition look smooth. For more habits like these, read our tips to take your diamond painting to the next level.
Tool comparison
| Tool | What it does | Best for |
|---|---|---|
| Multi-placer | Places several drills at once | Large blocks of one color |
| Single-drill pen | Precise placement | Details and edges |
| Wheel and roller | Rolls drills in lines and presses them flat | Big areas and finishing |
| Tweezers | Lifts and corrects drills | Fixing mistakes |
| Light pad | Backlights the canvas | Reading symbols |
| Magnifier | Enlarges the canvas | Fine detail |
| Storage box | Keeps colors separate | Tidy, portable work |
Build your tool set. Buy 2 kits and save 10%, or buy 3 and save 15%, applied at checkout.
Browse suppliesFrequently asked questions
What tools do I need for diamond painting?
The kit includes tweezers, pens, a multi-placer, trays and wax, which is enough to start. A light pad, a roller and a storage box are popular upgrades.
Is a multi-placer worth it?
Yes, for large blocks of one color. It picks up several drills at once, so it saves a lot of time.
Do I need a light pad?
It is not required, but it makes symbols easier to read and reduces eye strain, especially with dark colors.
What is the best way to store drills?
Keep each color in its own labeled container, such as a vial or a box with compartments.
How do I fix a wrongly placed drill?
Lift it out with tweezers and press the correct color into the same cell.
Start with the tools in your kit, then add a light, a roller or a storage box when you feel the need. Every extra should make your sessions easier and your results sharper.
Pick a design and get free worldwide shipping with tracking.
Shop all kits