This is a full starter guide for anyone who has just opened a diamond painting kit, or is about to buy one. It shows you what is in the box, how to set up, the order to work in and the small habits that give a polished result. You will also find tool picks, a short list of beginner mistakes, ways to finish and display your piece, and answers to the questions newcomers ask most.
Every kit ships free worldwide with a velvet canvas, AB drills and all the tools you need to start.
Shop diamond painting kitsWhat is in your kit
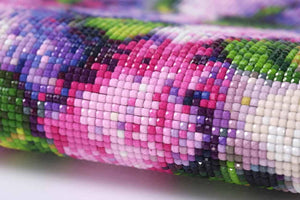
Our kits use 5D full drill designs on a soft velvet canvas. The glue is poured onto the canvas and covered by a clear film, and the symbols are printed on top. The drills are acrylic resin, about 2.5 mm, and every kit includes at least 2 colors of AB drills that add an iridescent shimmer. Most designs come in square, for a crisp mosaic, or round, which is faster and sparklier.

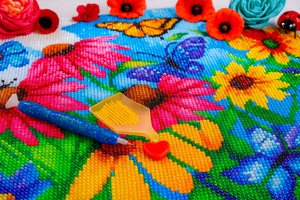
In the box you will find the canvas, pre-sorted drills with spares, 2 trays, tweezers, 2 pens, a 3-piece multi-placer, 2 pots of wax and instructions. Sizes larger than 30 x 40 cm ship in a box.
Choosing your first kit
For a first project, a standard 30 x 40 cm design is a friendly size. Pick a picture you love, because you will look at it for many evenings. Round drills are quicker to place and a gentle start, while square drills give the sharpest detail once you are comfortable. Browse by theme, such as animals or Christmas, and choose what makes you smile.
How to start
- Flatten the canvas. If it arrived rolled, press it flat under a few books for a few hours.
- Check your drills. Each bag matches a symbol on the canvas legend. Keep them sealed until you need them.
- Peel back one section of film. Expose only the area you can finish in one sitting.
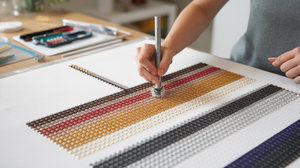
- Dip the pen in wax. A thin touch is enough to pick up a drill.
- Work color by color. Pick one symbol, pour a few drills into the tray and place them across the section.
Plan on 10 to 15 hours for a 30 x 40 cm design, which holds about 19,200 drills. Short sessions work better than marathons.

Tools worth adding
The kit tools are enough to begin, and these upgrades make the work smoother.
- Light pad. It backlights the canvas so symbols stand out, which helps with dark designs.
- Multi-placer heads. They place several drills at once for large blocks of one color.
- Storage box. Compartments with labels keep colors apart and the table tidy.


Want the full picture? Read our guide to diamond painting tools and how to use them.
Hacks for a flawless finish
- Roll when you finish a section. A roller presses drills into the glue so they stay put.
- Seal the piece. A clear sealer locks the drills in, especially if you will frame or gift it. See how to seal and frame a diamond painting.
- Tape the edges. Washi tape around the border keeps edges clean and stops sleeves sticking.

Beginner mistakes to skip
- Too much wax. A gunky pen tip leaves residue on drills. A little goes a long way.
- Peeling off all the film. Dust and sticky glue do not mix. Expose only what you can finish.
- Not labeling drills. Write the symbol on each container, especially if you run two kits.
Everyone makes at least one of these. Our guide on common mistakes and how to fix them covers every fix.
Workspace and storage
A good setup beats a fancy one. Pick a flat, well-lit surface, such as a desk or a lap table, away from pets and small hands. Add a lamp or a light pad if your room is dim. Lay a silicone baking mat or craft mat under the canvas to catch wax smudges and stray drills.

- Use sealed containers or a drill box, and label each color with its symbol.
- Keep work in progress in a folder or portfolio sleeve so the canvas stays clean.
- Put the legend next to you so you never guess a color.
Level up your craft
When you are comfortable, try these moves.
- Blend shades. Mix similar spare drills at the edge of two colors to create a soft fade.
- Use AB drills for accents. Their iridescent finish catches light in stars, eyes and water.
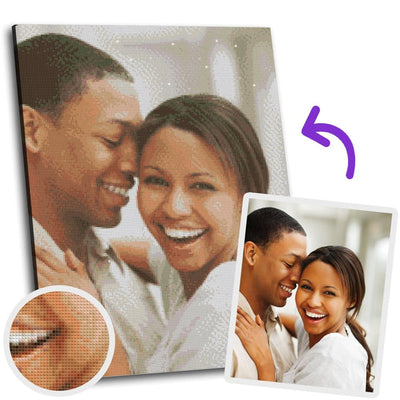
- Make it personal. Our custom kit turns a photo of a pet, a child or a favorite place into a canvas, with a free design preview before printing.


Frame and display
A finished piece deserves a wall. Wooden frames give a clean, finished look, and a standard poster frame works too if the size matches. Measure your canvas first, and leave the surface dry and free of dust before it goes behind glass.


Store spare canvases flat or in a roomy folder, not rolled tightly. If you ever see a crease, our guide on removing wrinkles and creases shows how to smooth it out before you start.
Buy 2 kits and save 10%, or buy 3 and save 15%, applied at checkout. Start with one and grab a second for a friend.
Shop best sellersFrequently asked questions
How long does a diamond painting take?
A 30 x 40 cm kit holds about 19,200 drills and takes roughly 10 to 15 hours. Larger designs take longer, and you can work at your own pace.
What is the difference between 3D and 5D drills?
5D drills have more facets, so they catch more light and sparkle more. Our kits use 5D drills.
What if I run out of a color?
Your kit includes spare drills. If a color is still short, contact us and we will help.
Do I need to seal my diamond painting?
It is optional, but sealing helps keep the drills in place, especially if you will hang it without glass.
Can kids do diamond painting?
Yes, with supervision. Choose a simple design and round drills, which are easier to place.
Take it one section at a time, enjoy the rhythm and let the picture build up. Your second kit will always look better than the first.
Choose your first kit and enjoy free worldwide shipping with tracking.
Shop all kits